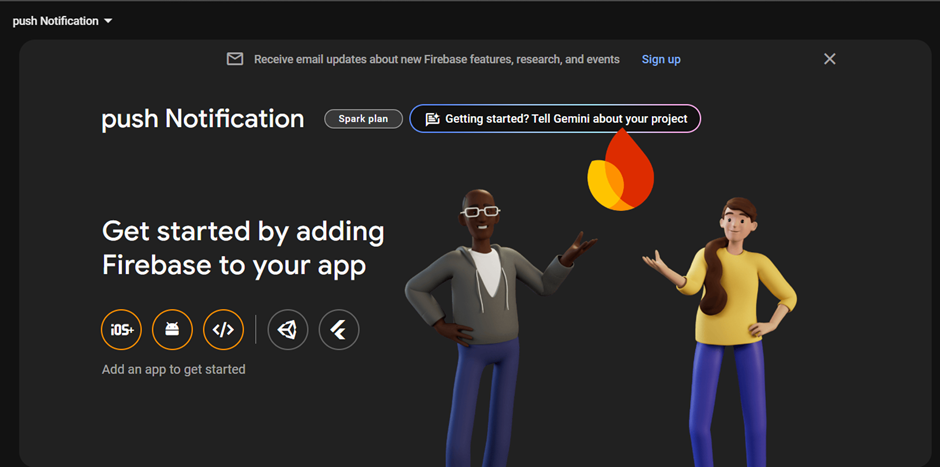
In this tutorial we will learn about push notification using firebase. If we have only required for android anyway and you can easily use push notification with firebase without any database used.
Ionic Capacitor Push Notification Setup
First of all, we will create ionic app with capacitor. We can also build our app and add the native platform, which we need. Currently have added android platform.
ionic start pushnotification -–type=angular
Cd ./ pushnotification
ionic build
npx cap add android
capacitor.config.json
make some change in capacitor.config.json. when create project then ionic added automatically appId, you can change API, which you want, I have added AppId 'com.pushnotification.app'
import type { CapacitorConfig } from '@capacitor/cli';
const config: CapacitorConfig = {
  appId: 'com.pushnotification.app',
  appName:’Push Notification’,
  webDir: 'www',
 server:{
  androidScheme:'https'
 },
 plugins: {
  "PushNotifications": {
      "presentationOptions": ["badge", "sound", "alert"]
  }
},
};
Install Firebase Plugins
we are using @capacitor/push-notifications for implelement push notification
npm install @capacitor/push-notifications
npx cap sync
Firebase Configuration
Get start by creating a new Firebase project or you can use existing project that
You already create for your app.
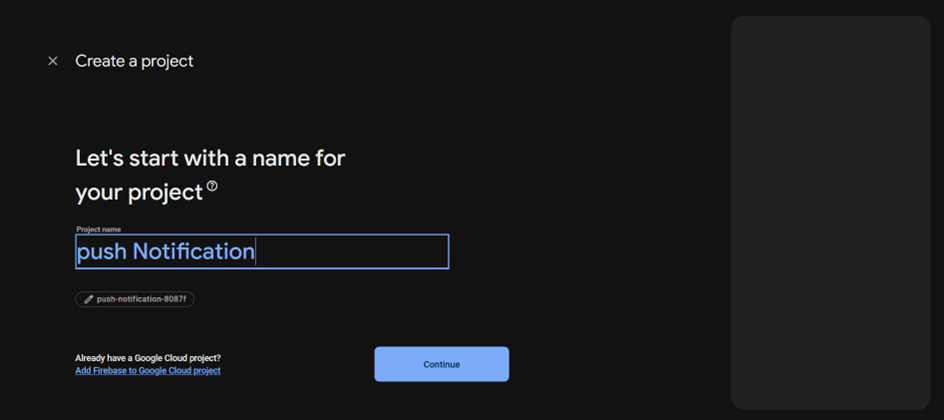
If you have a blank new app you should go to firebase console, then showing option to dashboard create a project. Click on create a project, then it will be asking for project name. Add project name and hit the continue.
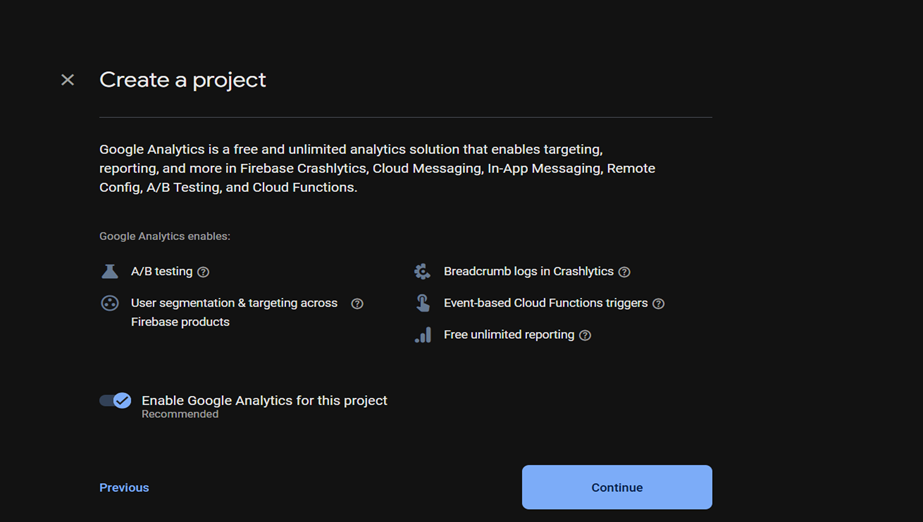
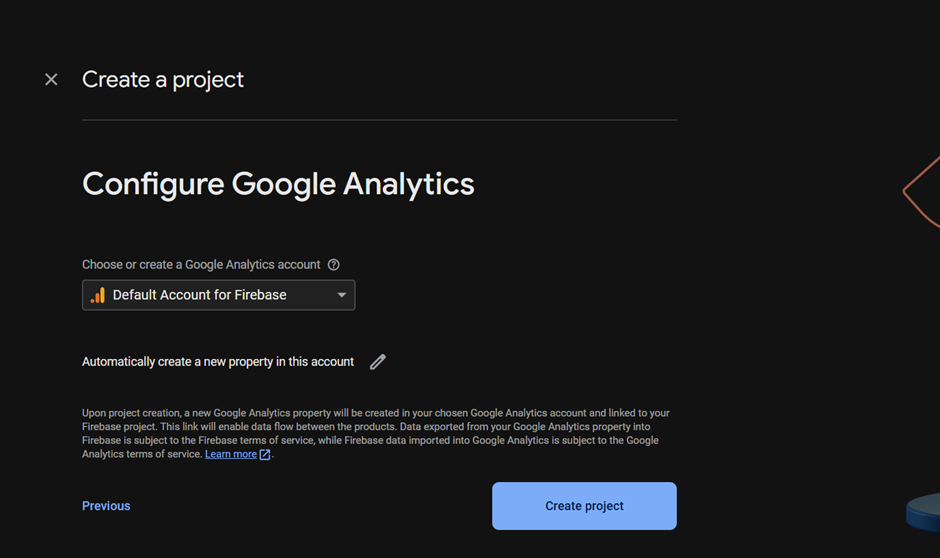
Select the default account and hit the continue, It will take some time to create firebase project.
When create project then you will see multiple platform option on dashboard.
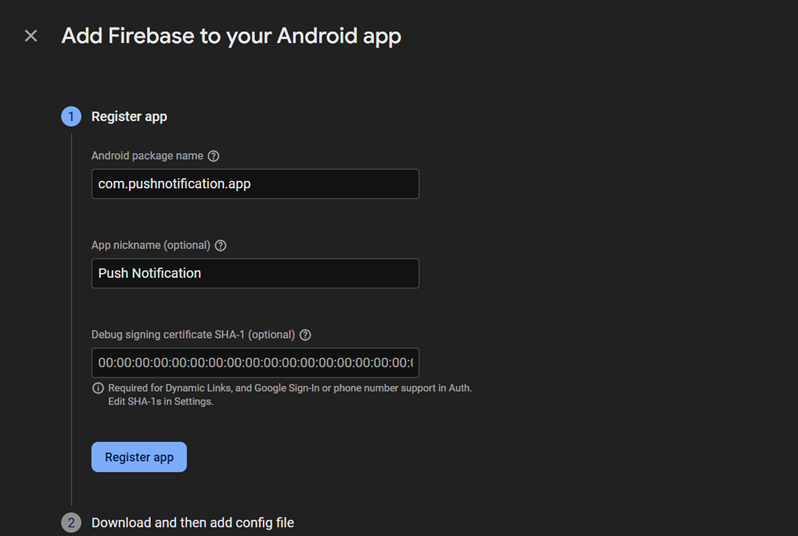
Click on android icon for configure push notification. It will be asking for package name and app name. Add both details and click on register app
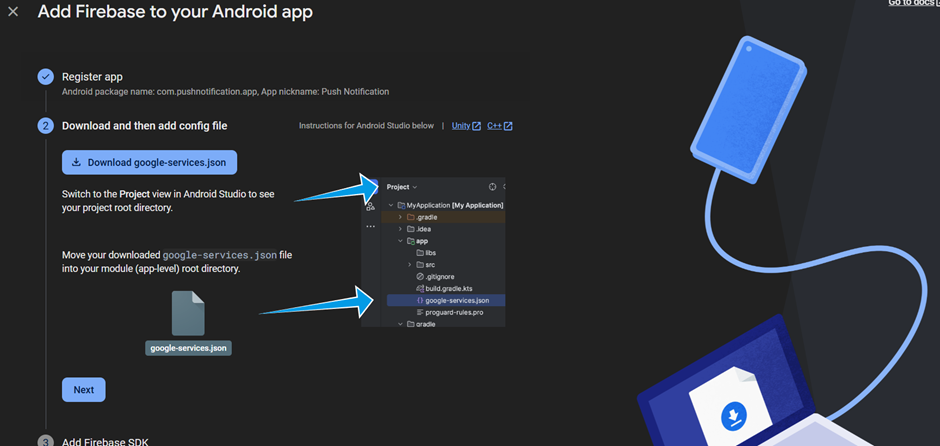
After that it will show google-services.json file. Download this file in local system. After download file click on next button
Then again hot the next button, now it will show Continue to console click for to firebase console.
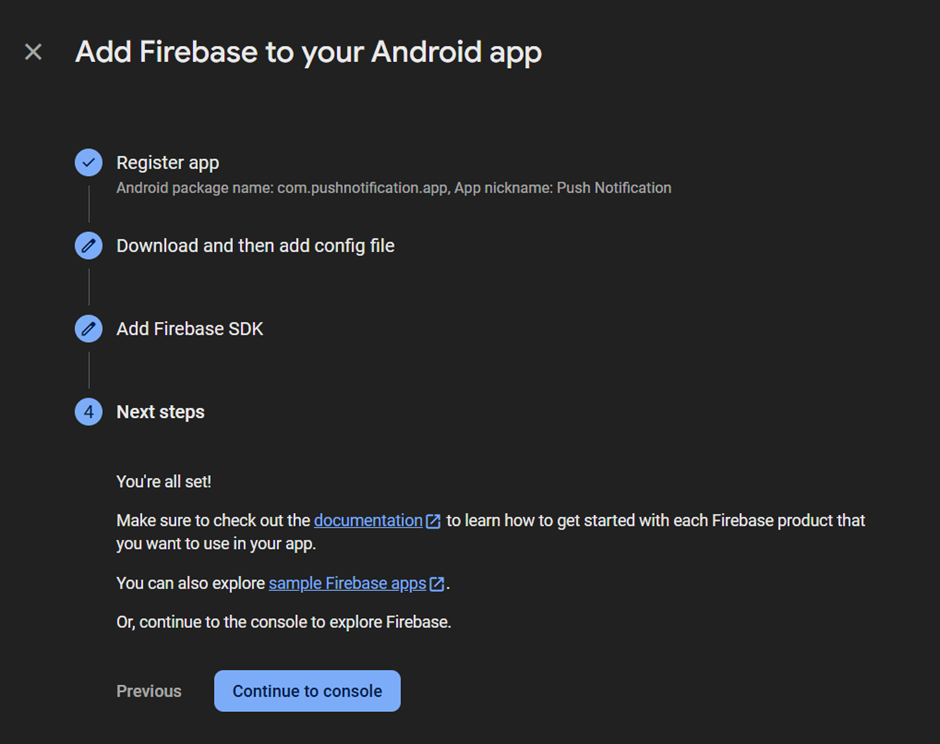
Congratulation: firebase push notification configuration successfully done.
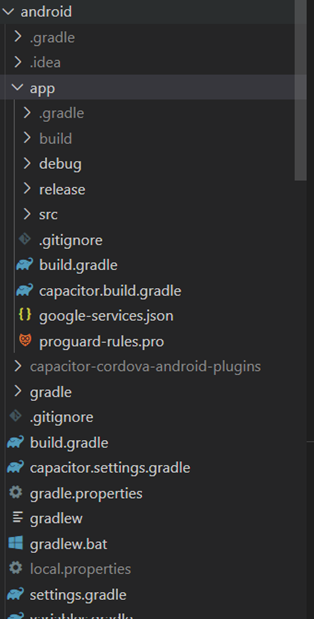
Android Push Preparation
There is only one thing to do for Android, and that’s moving the google-service.json that you downloaded to the android/app folder. Image below given.
Implement Ionic push Notification
Our app we want to add all push notification logic inside a service, and we are also creating new page so we can implement push notification redirect behavior. For create new service and page run following command which are given below.
Ionic g service services/fcm
Ionic g page redirect-notification
To include our new page in the routing, we will change the default entry to contain a dynamic id inside the path like this inside our app/app-routing.module.ts
import { NgModule } from '@angular/core';
import { PreloadAllModules, RouterModule, Routes } from '@angular/router';

const routes: Routes = [

  {

    path:'',redirectTo:'home',pathMatch:'full'

  },

  {

    path: 'home',

    loadChildren: () => import('./home/tabs.module').then(m => m.HomePageModule)
  },

  {

    path:'redirect-notification',

    loadChildren:()=>import('./redirect-notification/redirect-notification.module')
.then(m=>m.RedirectNotificationModule),

  },


];

@NgModule({

  imports: [
    RouterModule.forRoot(routes, { preloadingStrategy: PreloadAllModules })

  ],
  exports: [RouterModule]

})

export class AppRoutingModule {}
First add in service for asking for permission to send a push, registers our device and catched a bunch of events with additional listeners.
- registration: Executed after a successful registration, and the place where you receive back the token of the device to which you can send a push.
- registrationError: Shouldn't happen and indicates something went wrong!
- pushNotificationReceived: Triggered whenever a notification was catched from your app.
- pushNotificationActionPerformed: called when a user really taps on a notification when it pops up or from the notification center.
import { Injectable, NgZone } from '@angular/core';

import { Router } from '@angular/router';

import { Capacitor } from '@capacitor/core';

import { PushNotifications } from '@capacitor/push-notifications';


import { map } from 'rxjs';

import { HttpClient } from '@angular/common/http';

import { environment } from 'src/environments/environment';

@Injectable({

  providedIn: 'root'

})

export class FcmService {

  constructor(private router: Router, private authService: AuthService, private http: HttpClient, private zone: NgZone) { }

  initPush() {

    console.log("platform wroking");

    if (Capacitor.isNativePlatform()) {

      this.registerPush();

    }

  }

  private registerPush() {

    PushNotifications.requestPermissions().then(async (permission) => {

      if (permission.receive == 'granted') {

        await PushNotifications.register();

      } else {

        // No permission to push granted

      }

    });

    PushNotifications.addListener('registration', async token => {

      console.log("token", token);

      if (token)

        localStorage.setItem('push-notification-token', token.value);

      });
    PushNotifications.addListener('registrationError', (error: any) => {

      console.log('Error', JSON.stringify(error));

    });

    PushNotifications.addListener('pushNotificationActionPerformed', async (notification) => {

      console.log("notification", notification);

      const data = notification.notification;

      console.log("data token data", data.data);

       this.router.navigateByUrl("/redirect-notification");

    })

  }

}
pushNotificationActionPerformed listener you can now also see our redirect behaviour. when the background of the push notification. When click the notification it will open app and automatically redirect to "redirect-notification" page.
This service has basically only one public function that we can call from the outside, which will trigger all the permission and registration, and for us a good place is the app/app.component.ts:
import { Component } from '@angular/core';

import { Platform } from '@ionic/angular';
import { SplashScreen } from '@ionic-native/splash-screen/ngx';
import { StatusBar } from '@ionic-native/status-bar/ngx';
import { FcmService } from './services/fcm.service';

@Component({
  selector: 'app-root',
  templateUrl: 'app.component.html',
  styleUrls: ['app.component.scss']
})
export class AppComponent {
  constructor(
    private platform: Platform,
    private splashScreen: SplashScreen,
    private statusBar: StatusBar,
    private fcmService: FcmService
  ) {
    this.initializeApp();
  }

  initializeApp() {
    this.platform.ready().then(() => {
      this.statusBar.styleDefault();
      this.splashScreen.hide();

      this.fcmService.initPush();
    });
  }
}
Now you just need to build the app, sync your changes and deploy your app to your device.
ionic build
npx cap sync
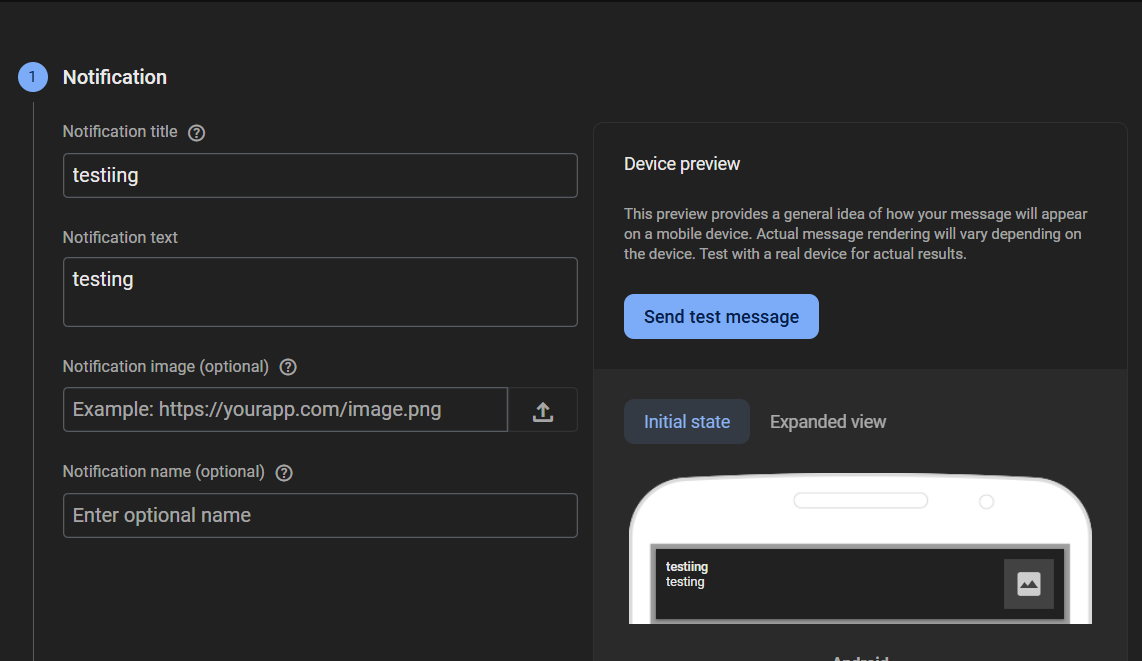
Sending Push Notifications with Firebase
When you deploy your app to a device you can see the console logs and see the token. With this token you are able to send a targeted device notification for testing. it will working.
Now goto firebase console and navigate Colud Messaging and send Send test message withing firebse and add the device token you got from the logs.

Conclusion
push notifications are a powerful tool for engaging and communicating with users, allowing real-time updates and re-engagement even when an app is not active
Login to leave a comment.