What is Django?
Django is a high-level Python web framework that alows you to quickly build secure and scalable web applications.
Key Features:
- MTV architecture (Model Template View)
- Built-in admin panel
- ORM(Object-Relational Mapping) for database operations
- Default Authentication system (login, signup, permissions)
- URL routing and views
- Middleware and request/response handling
What is GraphQL?
GraphQL is a query language and server-side runtime for application programming interfaces(APIs). It's developed by Facebook. That gives API clients exactly the data they requested.It is alternative for rest API.
Key Features:
- Client asks for exactly what it needs, nothing more, nothing less
- The Response structure mirrors the request structure.
- Single endpoint vs Rest's multiple URLS.
- Greate for frontend apps (React, Angular, etc.).
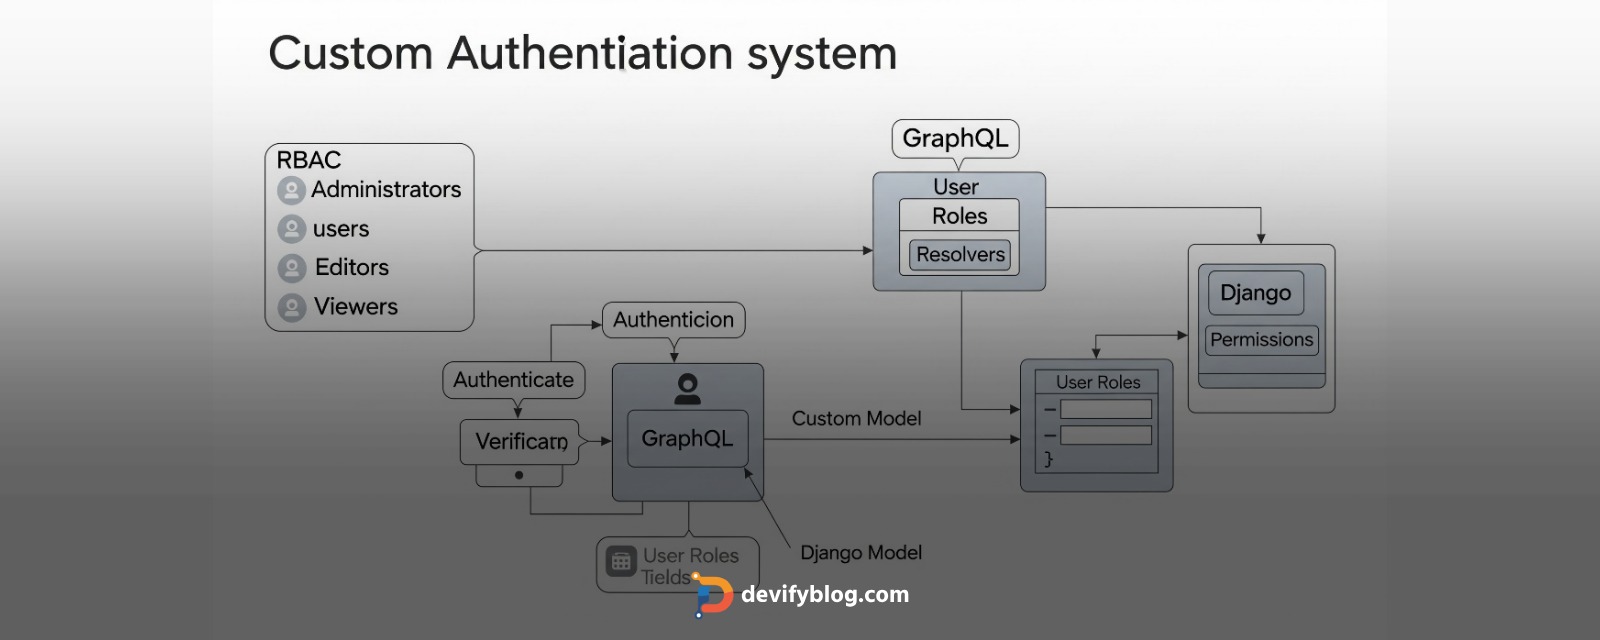
Django with GraphQL
We are using graphene-django with bind graphQL with Django. django-graphql-jwt for JWT authentication over GraphQL.
Step1: Create Virtual Environment
py -m venv env
Active envirement in linux and MAC
source env/bin/activate
For Windows
env\Scripts\activate
Step2: Install Packages
We have installed Django, graphene-django, django-graphql-jwt
pip install django graphene-django django-graphql-jwt
Step3: Create Django Project
we are creating new Django project which name is custom_authentication. For create django new project command is below.
django-admin startproject custom_authentication
cd custom_authentication
Step4: Create Django App
Now, We are creating Django App which name is account. For create django app command is below.
python manage.py startapp account
Register the app in settings.py by adding it to the INSTALLED_APPS list. And add graphQL and and graphQL-jwt
INSTALLED_APPS = [
   ...
    "accounts",
    "graphene_django",
    "graphql_jwt.refresh_token.apps.RefreshTokenConfig",
]
Also, add the GraphQL JWT settings in settings.py to configure authentication.
GRAPHQL_JWT = {
    "JWT_PAYLOAD_HANDLER": "utils.jwt.custom_jwt_payload",
    "JWT_AUTH_HEADER_PREFIX": "Bearer",
    "JWT_VERIFY_EXPIRATION": True,
    "JWT_LONG_RUNNING_REFRESH_TOKEN": True,
    "JWT_EXPIRATION_DELTA": timedelta(minutes=10),
    "JWT_REFRESH_EXPIRATION_DELTA": timedelta(days=7),
    "JWT_SECRET_KEY": SECRET_KEY,
    "JWT_ALGORITHM": "HS256",
}
GRAPHENE = {
    "SCHEMA": "hr.schema.schema",
    "MIDDLEWARE": [
        "graphql_jwt.middleware.JSONWebTokenMiddleware"
    ],
}
AUTHENTICATION_BACKENDS = [
    "graphql_jwt.backends.JSONWebTokenBackend",
    "django.contrib.auth.backends.ModelBackend",
]
Create a schema.py file in the main project folder to define the GraphQL schema.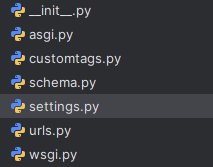
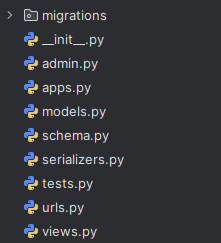
Also, create a schema.py file inside the account app to define its specific GraphQL types, query and mutations.
Add the account app’s query and mutation to the main schema.py file.
# custom_authentication/schema.py
import graphene
import accounts.schema

class Query(accounts.schema.Query, graphene.ObjectType):
    pass
class Mutation(accounts.schema.Mutation, graphene.ObjectType):
    pass

schema = graphene.Schema(query=Query, mutation=Mutation)
Add the GraphQL URL route in custom_authentication/urls.py to enable the GraphQL endpoint.
from django.contrib import admin
from django.urls import path
from graphene_django.views import GraphQLView
from django.views.decorators.csrf import csrf_exempt
from .schema import schema  # assuming your schema is in schema.py in the main folder

urlpatterns = [
    path('admin/', admin.site.urls),
    path('graphql/', csrf_exempt(GraphQLView.as_view(graphiql=True, schema=schema))),
]
Step4: account/schema.py - Role-Based User Register via GraphQL
For User Register we have define UserType and Register User Mutation RegisterUser
In UserType, we defined the fields that will be returned after user registration, such as id, email, first_name, last_name, and phone_number. And return user role
class UserType(DjangoObjectType):
    role = graphene.String()
    class Meta:
        model = CustomUser
        fields = (
            "id", "email", "first_name", "last_name", "phone_number"
        )

    def resolve_role(self, info):
        group = self.groups.first()
        return group.name if group else None
In the RegisterUser mutation, we collect essential details from the user including email, password, first_name, last_name, phone_number, and role. These arguments allow us to create a new user account using Django’s custom user model.
Once the user is created, we handle role assignment by checking if the provided role (which corresponds to a Django group) already exists. If it does not exist, the system automatically creates a new group with the given role name. After that, the role is assigned to the user by linking them to the appropriate group.
Additionally, once the registration is successful, the user is automatically authenticated. We generate both access and refresh JWT tokens using get_token() and create_refresh_token() respectively. The mutation then returns the user object, tokens, and a list of their assigned permissions.
This setup ensures a clean and secure role-based user registration system with flexible access control.
class RegisterUser(graphene.Mutation):
    user = graphene.Field(UserType)
    token = graphene.String()
    refresh_token = graphene.String()
    permissions = graphene.List(graphene.String)

    class Arguments:
        email = graphene.String(required=True)
        password = graphene.String(required=True)
        first_name = graphene.String(required=True)
        last_name = graphene.String(required=True)
        phone_number = graphene.String(required=True)
        role = graphene.String(required=True)

    def mutate(self, info, email, password, first_name, last_name, phone_number, role):
        # Create the user
        user = CustomUser.objects.create_user(
            email=email,
            password=password,
            first_name=first_name,
            last_name=last_name,
            phone_number=phone_number
        )

        # Assign role (group)
        group, created = Group.objects.get_or_create(name=role)
        user.groups.add(group)

        # Automatically login the user
        token = get_token(user)
        refresh_token = create_refresh_token(user)
        permissions = list(user.get_all_permissions())

        return RegisterUser(
            user=user,
            token=token,
            refresh_token=refresh_token,
            permissions=permissions
        )
class Mutation(graphene.ObjectType):
    register_user = RegisterUser.Field()
-
Mutation: This is a special GraphQL object type used to define all the operations that change data (like creating, updating, or deleting). -
graphene.ObjectType: It's the base class fromgrapheneused to define GraphQL types (Query, Mutation, etc.). -
register_user = RegisterUser.Field():-
This adds the
RegisterUsermutation to the schema under the nameregister_user. -
It tells GraphQL: "Hey, when someone calls the
register_usermutation, run the logic insideRegisterUser".
-
Run the application using python manage.py runserver, then open your browser and navigate to http://127.0.0.1:8000/graphql to access the GraphQL interface.
Create mutation:
mutation RegisterUser($email:String!, $firstName:String!,
  $lastName:String!, $password:String!, $phoneNumber:String!, $role:String!){
  registerUser(email:$email, firstName:$firstName, lastName:$lastName, password:$password, phoneNumber:$phoneNumber, role:$role){
    user{
      id,
      email,
      firstName,
      lastName
    },
    token,
    refreshToken,
    permissions
  }
}
Pass variable in a register user mutation:
{
  "email": "company85@gmail.com",
  "firstName": "Nitish",
  "lastName": "Sharma",
  "phoneNumber": "1234567890",
  "password": "123456",
  "role": "employee"
}
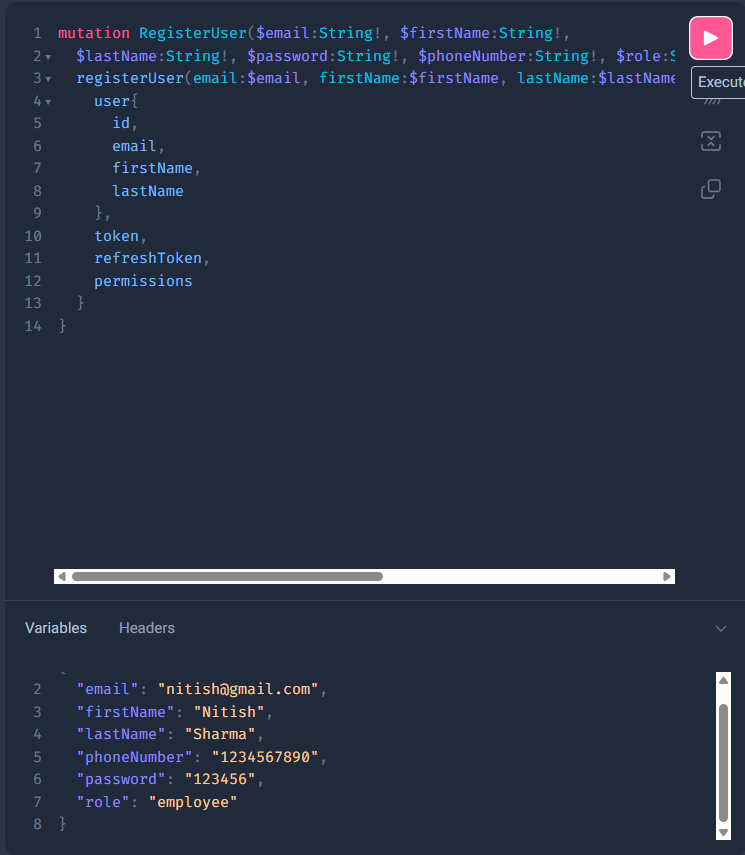
The response includes user details along with their role, access token, and refresh token.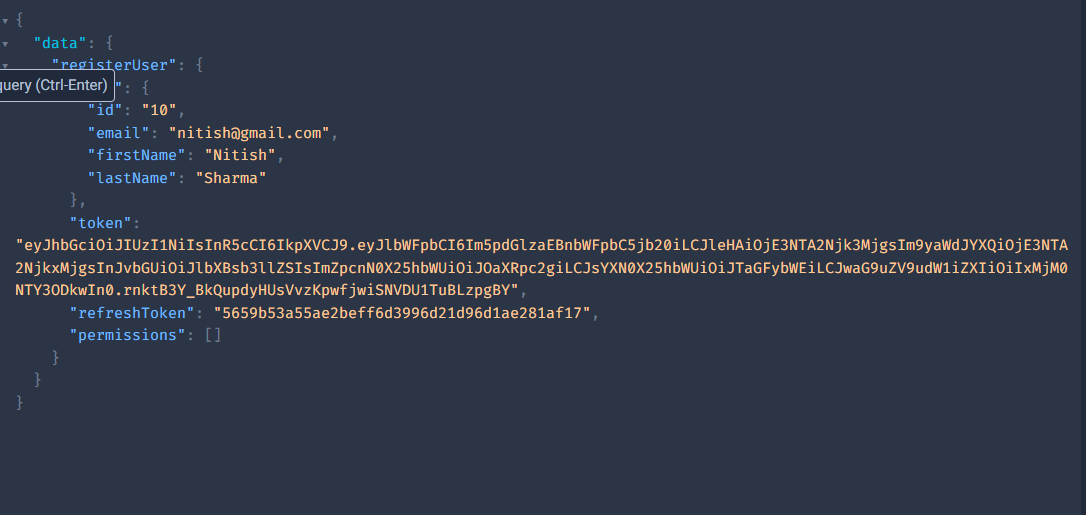
Step5: Login user with GraphQL
To log in a registered user, we use the LoginUser GraphQL mutation. This mutation accepts the user’s email and password as input and verifies their credentials using Django's authentication system.
If the credentials are valid, the user is authenticated, and the server responds with an access token, a refresh token, the user's details, and a list of their permissions.
This login mutation allows secure access to protected parts of your app using token-based authentication.
You can execute the login mutation from the GraphiQL interface by passing the email and password either directly or through variables.
class LoginUser(graphene.Mutation):
    token = graphene.String()
    refresh_token = graphene.String()
    user = graphene.Field(UserType)
    permissions = graphene.List(graphene.String)


    class Arguments:
        email = graphene.String(required=True)
        password = graphene.String(required=True)

    def mutate(self, info, email, password):
        user = authenticate(email=email, password=password)
        if not user:
            raise Exception("Invalid username or password.")

        token = get_token(user)
        refresh_token = create_refresh_token(user)
        permissions = list(user.get_all_permissions())
        return  LoginUser(user=user, token=token, refresh_token=refresh_token, permissions=permissions)
Add the LoginUser mutation under the Mutation class to enable user login through GraphQL.
class Mutation(graphene.ObjectType):
    register_user = RegisterUser.Field()
    login_user = LoginUser.Field()
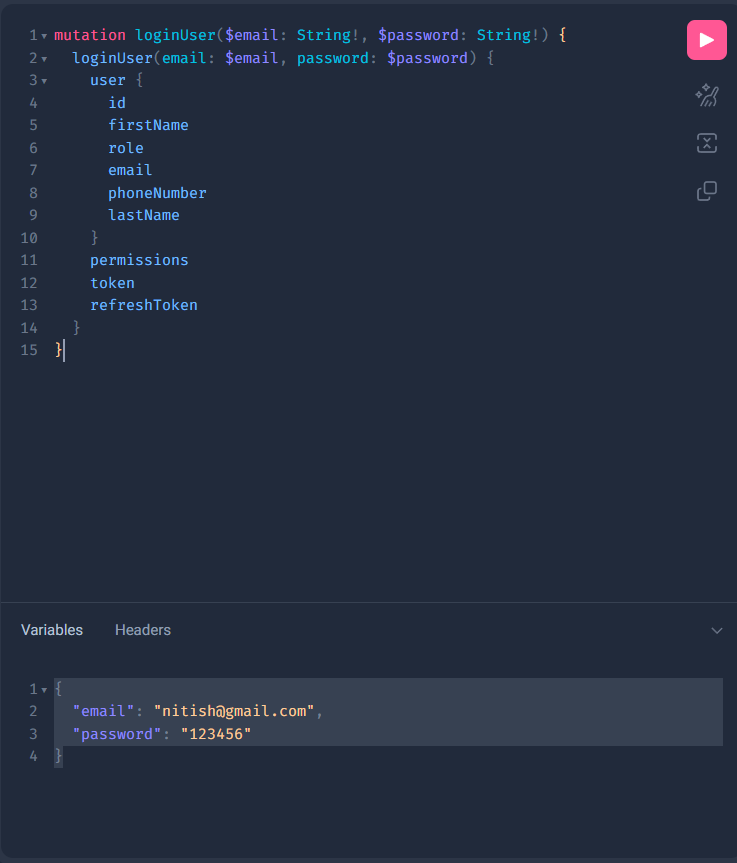
Create a GraphQL mutation query for loginUser to authenticate the user and retrieve their access token, refresh token, user details, and permissions.
mutation loginUser($email: String!, $password: String!) {
  loginUser(email: $email, password: $password) {
    user {
      id
      firstName
      role
      email
      phoneNumber
      lastName
    }
    permissions
    token
    refreshToken
  }
}
Pass variable in a login user mutation:
{
  "email": "nitish@gmail.com",
  "password": "123456"
}
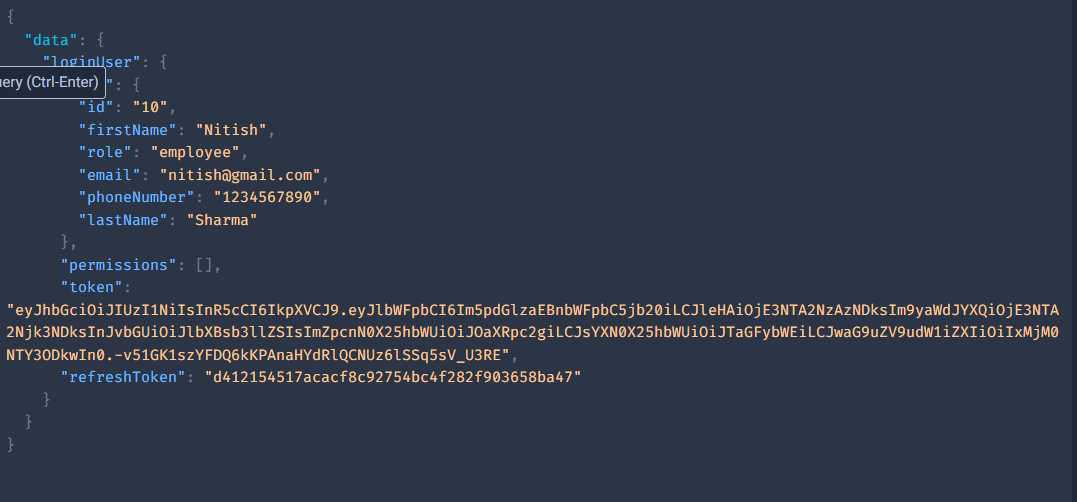
The response includes user details along with their role, access token, and refresh token.
Login to leave a comment.